Preparing for your Pooch Pedicure
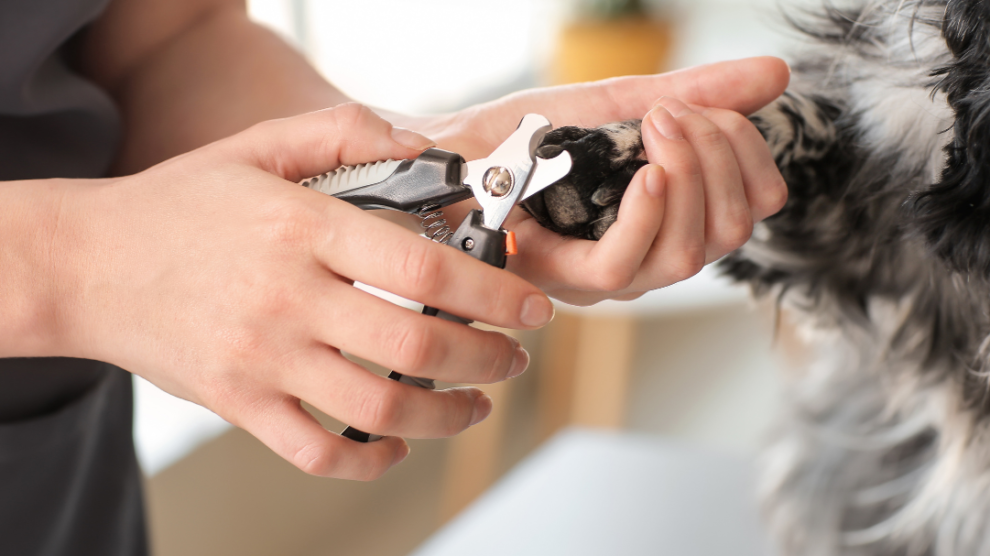
Trimming your dog’s nails is an essential part of their grooming routine. Overgrown nails can cause discomfort, affect your dog’s posture, and even lead to painful injuries. Using dog nail clippers properly can make the process stress-free for both you and your pet. In this guide, we’ll cover everything you need to know about using dog nail clippers effectively, from choosing the right tools to mastering safe trimming techniques.
Why Nail Trimming is Important for Dogs
Regular nail trimming is important for several reasons:
- Prevents Pain and Discomfort: Overgrown nails can press against the paw pads, causing discomfort or even pain when walking.
- Improves Posture and Mobility: Long nails affect a dog’s posture, as they may adjust their gait to avoid pain, which can lead to joint problems over time.
- Reduces the Risk of Injury: Longer nails are prone to breaking, which can lead to painful tears and potential infections.
To avoid these issues, aim to trim your dog’s nails every 3-4 weeks, or as often as needed based on their nail growth rate and activity level.
Types of Dog Nail Clippers
There are three main types of dog nail clippers, and choosing the right one can make the process easier and safer:
- Guillotine Clippers: These clippers have a hole where you place the dog’s nail, and a blade cuts it as you squeeze the handle. They work well for small to medium-sized dogs but may not be as effective on thick nails.
- Scissor Clippers: These look similar to scissors and are ideal for larger dogs or dogs with thick nails. Scissor clippers provide better control and leverage for cutting tough nails.
- Grinder or Dremel: A grinder uses a rotating file to gradually trim the nail, which is useful for dogs that are sensitive to clippers. It can provide a smoother finish but requires a longer process.
Choose the clippers that best suit your dog’s size and nail thickness, and make sure they are sharp to avoid any jagged cuts or discomfort.
Step-by-Step Guide to Using Dog Nail Clippers
Here’s a step-by-step approach to safely trimming your dog’s nails with clippers:
Step 1: Gather Your Supplies
Before you start, ensure you have everything you need within reach:
- Dog nail clippers (appropriate type and size for your dog)
- Styptic powder or cornstarch (in case of bleeding)
- A towel or mat to help keep your dog comfortable
- Treats to reward your dog throughout the process
Having everything close by will help make the trimming session smoother and less stressful.
Step 2: Get Your Dog Comfortable
Choose a calm, quiet environment to trim your dog’s nails. If your dog is new to nail trimming or is anxious, start by making them comfortable with the clippers. Allow them to sniff the clippers, and offer treats to create a positive association. You can also try gently holding their paw and touching each nail to help them get used to the sensation.
Step 3: Locate the Quick
The “quick” is the part of the nail that contains blood vessels and nerves. Cutting into the quick can cause pain and bleeding, so it’s essential to locate it before trimming. The quick is usually visible as a pink area inside lighter nails, making it easier to avoid. However, on black nails, the quick is harder to see, so trim small portions at a time to avoid cutting too far.
Tip: If you’re unsure, trim small amounts bit by bit until you notice a lighter center in the nail, which indicates you’re close to the quick.
Step 4: Position the Clippers Correctly
Hold your dog’s paw firmly but gently. Place the clippers at a 45-degree angle and position them below the quick. For dogs with darker nails, aim to trim just a little at a time to be cautious. Avoid pressing on the nail too hard, as it could cause discomfort.
Tip: Trim in small increments rather than trying to cut large portions at once. This not only prevents accidentally cutting the quick but also keeps the nails smooth.
Step 5: Start Trimming
Begin with a back paw, as dogs tend to be less sensitive about them. Place the nail in the clipper and squeeze gently to make a quick, clean cut. If your dog’s nails are very long, you may need to trim a bit more at first and gradually shorten them over time.
For grinder tools, move the grinder gently over the nail tip, applying minimal pressure. Grinding may take longer but can give you more control over the nail length and provides a smoother finish.
Step 6: Watch for Signs of Discomfort
If your dog appears nervous, stops cooperating, or becomes anxious, take a break and offer treats and praise. Building trust and confidence during nail trimming sessions is essential to make it a positive experience. You can always trim the nails over several sessions if needed.
Step 7: Handle Accidental Bleeding
If you accidentally cut into the quick and it begins to bleed, apply styptic powder or cornstarch to the nail to stop the bleeding. Hold gentle pressure on the nail with a cloth or paper towel until it stops. Remember to stay calm and reassure your dog if this happens—it’s a common accident and shouldn’t cause long-term issues.
Step 8: Finish with Praise and Rewards
Once you’re done trimming, offer your dog plenty of praise, pets, and treats. Positive reinforcement will help them associate nail trimming with rewards, making it easier the next time. You can even give them a favorite toy or a special treat to make the experience feel like a rewarding activity.
Tips for Successful Dog Nail Trimming
To ensure nail trimming goes smoothly every time, keep these additional tips in mind:
- Practice Short Sessions: If your dog is nervous, start with short sessions and trim only one or two nails at a time.
- Trim Regularly: The more frequently you trim, the easier it becomes to keep nails at a healthy length and prevent the quick from growing too long.
- Consider a Helper: For dogs that are more resistant, having someone gently hold or comfort them can make the process easier.
Woof. Woof.
Trimming your dog’s nails doesn’t have to be a daunting task. With the right tools, patience, and practice, you can learn to use dog nail clippers safely and effectively. By following these steps, you’ll help keep your dog’s nails at a healthy length, improve their comfort, and create a positive experience for both of you. Regular nail maintenance is an important part of your dog’s grooming routine, and with consistent practice, nail trimming can become an easy, stress-free process.


