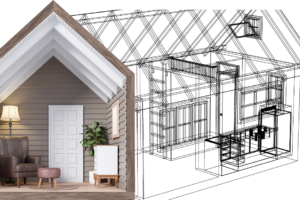


Building a shipping container home is an exciting and rewarding project. Shipping container homes have grown in popularity due to their affordability, sustainability, and modern, industrial aesthetic. They offer a unique blend of simplicity and innovation that appeals to many people who are looking for an alternative to traditional housing. If you’re curious about how to build a shipping container home, you’ve come to the right place!
In this article, we’ll walk you through the process step by step, from selecting the right containers to finishing the interior. Let’s get started!
Step 1: Plan Your Design and Budget
Like any home-building project, the first step in building a shipping container home is thorough planning. You’ll want to think about both the design and the budget for your container home.
Designing Your Container Home
Shipping containers come in standard sizes—20 feet long by 8 feet wide, or 40 feet long by 8 feet wide. The size of the home you want will determine how many containers you need. You can choose to stack them, place them side by side, or get creative by mixing and matching layouts.
Consider factors such as:
- How many rooms do you need?
- Do you want a single-story or multi-story design?
- Will you include large windows or a rooftop deck?
If you’re not sure where to start, consulting with an architect who has experience designing container homes can help ensure that your layout is both functional and stylish.
Setting Your Budget
Shipping container homes are known for being cost-effective, but the total cost can still vary widely depending on customizations and finishes. Make a list of priorities: What’s most important to you—luxury finishes, extra containers for more space, or keeping the build as budget-friendly as possible?
Step 2: Purchase Your Shipping Containers
The containers themselves are the backbone of your home, so finding good-quality ones is essential. You’ll have the option to buy either new or used containers. Used containers are typically cheaper, but be sure to inspect them thoroughly for rust, dents, or other damage.
Where to Buy Containers
- Shipping yards
- Container retailers
- Online suppliers specializing in shipping containers
A single 40-foot container typically costs between $3,500 and $7,000. Delivery costs can also vary depending on the distance and the number of containers you purchase. Be sure to factor delivery into your budget.
Step 3: Prepare Your Site and Lay the Foundation
Before you can set the containers in place, you need to prepare your site. This step is crucial to ensure your home is stable and secure.
Site Preparation
- Clear the land: Remove any trees, rocks, or debris.
- Level the ground: Containers need a flat surface to sit on.
- Install utilities: Depending on the location, you might need to prepare for water, sewage, and electricity connections at this stage.
Foundation Options
A shipping container home requires a solid foundation to sit on. The most common options are:
- Concrete slab: A flat, stable surface that supports the container’s weight.
- Concrete piers: Columns of concrete placed at key points (corners and along the edges).
- Steel beams: For added elevation or uneven terrain.
The cost of the foundation will depend on the type you choose and your site’s condition, but expect to spend between $5,000 and $15,000.
Step 4: Modify the Shipping Containers
Once your containers are delivered, it’s time to modify them to create your desired living space. Modifications may include cutting openings for windows and doors, adding insulation, and connecting multiple containers together.

Cutting and Framing
- Cut out windows and doors: You’ll need to cut steel for doors and windows and reinforce the openings with steel framing to maintain structural integrity.
- Join multiple containers: If you’re combining containers, you’ll cut out walls and weld the units together.
You can hire a professional to handle the cutting and welding, especially since these processes require heavy-duty tools and experience.
Step 5: Insulate the Containers
Shipping containers are made of steel, which means they’re not naturally well-insulated. Without proper insulation, the container will feel like an oven in the summer and a freezer in the winter.
Insulation Options
- Spray foam insulation: Highly effective, it seals small cracks and provides moisture protection.
- Fiberglass or foam board insulation: A more affordable option, but slightly less efficient.
Make sure to insulate both the walls and the ceiling to ensure your container home stays comfortable year-round.
Step 6: Install Windows, Doors, and Roofing
Now that your containers are modified, it’s time to install the windows, doors, and roofing. Choose energy-efficient windows and doors that will help maintain the home’s temperature. If you want more natural light, consider large floor-to-ceiling windows or even skylights.
Roofing Options
While the container’s roof is sturdy, it’s not designed for long-term weather exposure. You’ll need to add a proper roof to protect your home from the elements. Options include:
- Flat roof: Keeps the minimalist, modern aesthetic.
- Sloped roof: Better for areas with heavy rainfall or snow.
- Green roof: Adds sustainability and insulation with plants on the rooftop.
Step 7: Set Up Utilities
Your container home will need basic utilities like electricity, plumbing, and heating/cooling. Whether you’re connected to the grid or building off-grid, this is an important step.
Plumbing and Electrical
- Electrical wiring: Install outlets, lighting fixtures, and circuit breakers.
- Plumbing: Install pipes for water supply and drainage. If you’re in a remote area, you may need a septic system.
HVAC
For heating and cooling, consider a mini-split HVAC system, which works well in small spaces. Some container homeowners opt for radiant floor heating or solar-powered systems if they’re aiming for off-grid living.
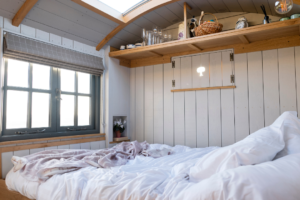
Step 8: Finish the Interior
Once your container is insulated and utilities are in place, it’s time to finish the interior. This is where your home starts to feel cozy and comfortable!
Interior Finishes
- Drywall or wood paneling: Cover the steel walls with drywall or wood to give the interior a more traditional look.
- Flooring: Install durable flooring like hardwood, tile, or laminate.
- Paint and trim: Add finishing touches to personalize the space.
Step 9: Add Exterior Features
Don’t forget about the outside of your container home! You can leave the container’s original look for an industrial vibe, or you can paint it to match your aesthetic.
Exterior Features
- Siding: Add wood, metal, or stone siding to cover the container walls.
- Deck or patio: Extend your living space with an outdoor deck or patio area.
- Landscaping: Complete your container home with some landscaping, like garden beds or a small lawn.
Step 10: Furnish and Move In!
With your container home built and finished, it’s time to make it truly yours by furnishing it. Since container homes are often small, focus on space-saving furniture like modular couches, fold-out tables, and storage solutions.
Once everything is in place, you’re ready to move into your one-of-a-kind shipping container home!
Final Thoughts
Building a shipping container home is a fantastic way to create a unique, modern, and sustainable living space. While the process takes time, effort, and careful planning, it can be incredibly rewarding. From choosing the perfect design to insulating the steel walls, each step brings you closer to your dream home.
Whether you’re building a tiny home for off-grid living or a larger container mansion, this guide gives you the basic framework to get started. Just remember, every container home project is different, and working with professionals for certain tasks can help ensure your home is safe and built to last.
Good luck on your journey to building your shipping container home!